Master Perfectly Crispy Roasted Chickpeas: No More Soggy Snacks
Are you perpetually on the hunt for a snack that truly satisfies – something crunchy, savory, and undeniably healthy? For many, the answer often defaults to potato chips or crackers, delicious but rarely delivering the sustained energy and nutritional punch we truly need. Enter the humble chickpea, transformed into a culinary superstar: crispy roasted chickpeas. This plant-based powerhouse offers a delightful textural contrast and a surge of protein and fiber, making it an ideal swap for less nutritious alternatives.
However, achieving that coveted, chip-like crispness isn't always straightforward. Many home cooks find themselves with soft, chewy, or even slightly soggy roasted chickpeas, missing that irresistible crunch. Fear not! Through extensive testing and a deep dive into the science of crisping, we're here to demystify the process. This comprehensive guide will equip you with the essential techniques and insider tips to ensure your roasted chickpeas emerge from the oven perfectly golden, brittle, and utterly addictive, every single time.
The Secret to Superior Crunch: Mastering the Art of Perfectly Roasted Chickpeas
Creating genuinely crispy roasted chickpeas is more an art than a simple recipe, and like any art form, it relies on mastering a few fundamental techniques. Forget everything you thought you knew about tossing and roasting; these critical steps are what elevate your snack from good to gourmet.
The Golden Rule: Impeccable Drying
This is, without a doubt, the single most crucial step in achieving crispy roasted chickpeas. Any residual moisture on the chickpeas will turn into steam in the hot oven, effectively steaming them rather than roasting, leading to a soft, chewy texture. Think of it like trying to fry wet French fries – you'll get a soggy mess. Here’s how to ensure your chickpeas are bone-dry:
- Rinse Thoroughly: If using canned chickpeas, drain them well and rinse them under cold water. This removes the starchy liquid (aquafaba) that can contribute to sogginess and helps to clean them.
- Pat, Pat, Pat: After rinsing, spread the chickpeas in a single layer on a clean kitchen towel or a double layer of paper towels. Gently pat them dry from all sides. Don't be shy – really get in there and absorb as much moisture as possible.
- The Roll & Air Dry Method: For an extra layer of dryness, gather the edges of the towel around the chickpeas and gently roll them back and forth. Then, spread them out again on a fresh, dry section of the towel or a baking sheet and allow them to air dry for another 10-15 minutes while your oven preheats. This allows any stubborn surface moisture to evaporate.
- Visual Check: Your chickpeas should appear matte, not shiny, and feel completely dry to the touch. If they still feel even slightly damp, continue patting. This step is non-negotiable!
Choosing Your Oil Wisely
Once your chickpeas are thoroughly dried, it's time for the oil. The right oil choice is important for two reasons: flavor and smoke point. You want an oil that can withstand high oven temperatures without burning or imparting a bitter taste.
- High Smoke Point Oils: Avocado oil is an excellent choice due to its neutral flavor and exceptionally high smoke point. Canola oil or peanut oil are also good, cost-effective alternatives. These oils allow the chickpeas to roast evenly and achieve crispness without scorching.
- Extra Virgin Olive Oil: While delicious for flavor, extra virgin olive oil has a lower smoke point. If you prefer its flavor, consider using it, but keep a closer eye on your chickpeas, especially if roasting at higher temperatures, as it can burn more easily. Some prefer to drizzle EVOO on *after* roasting for maximum flavor without the burn risk.
- Quantity is Key: You need just enough oil to lightly coat the chickpeas, not drown them. Too much oil will prevent them from crisping and can make them greasy. Generally, 1-2 tablespoons per can of chickpeas is sufficient.
The Roasting Rhythm: Temperature and Agitation
The oven is where the magic happens, but it requires a careful approach to ensure even crisping and prevent burning.
- Optimal Temperature: A consistent oven temperature, typically around 400°F (200°C), is ideal for roasting chickpeas. Ensure your oven is fully preheated, and consider using an oven thermometer for accuracy, as many home ovens can fluctuate.
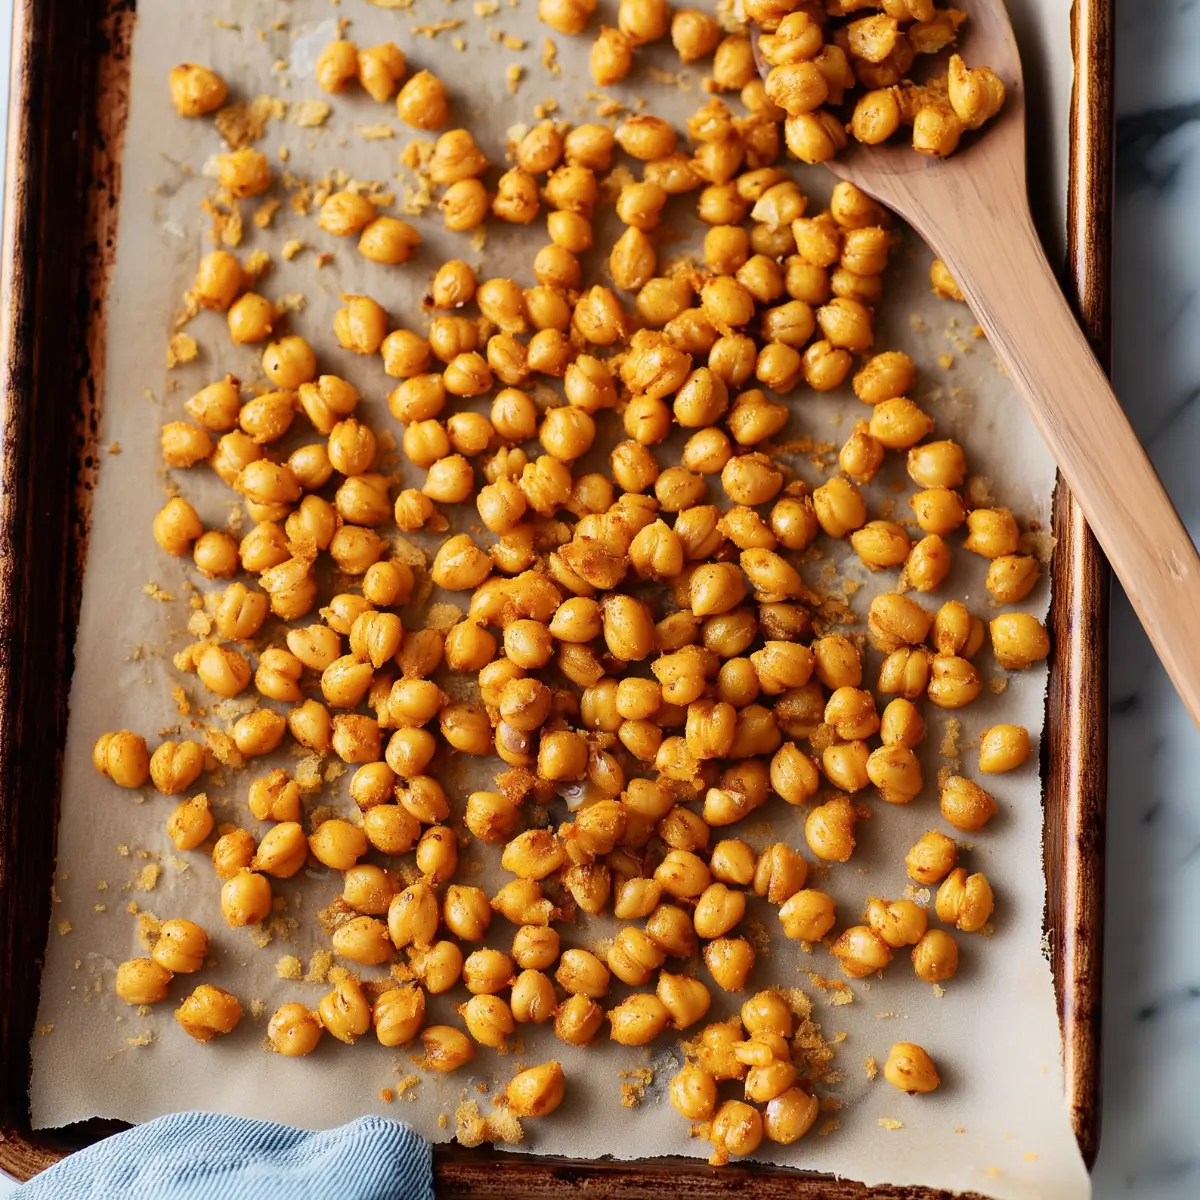
- Single Layer Spread: Arrange your oiled chickpeas in a single layer on a baking sheet. Do not overcrowd the pan! If your chickpeas are piled on top of each other, they will steam instead of roast. Use two baking sheets if necessary, giving them ample space to breathe.
- Shake and Stir: This is a crucial technique often overlooked. Every 10-15 minutes, open the oven and gently shake the baking sheet or use a spatula to stir the chickpeas. This prevents moisture from getting trapped underneath, promotes even browning, and ensures uniform crispness. It also helps prevent any single chickpea from burning.
- Roast Until Golden: Continue roasting and shaking until the chickpeas are a rich, deep golden brown and feel firm and crisp when squeezed (carefully!) between your fingers. The total roasting time will vary depending on your oven and how dry your chickpeas were initially, but typically ranges from 25-40 minutes.
Flavor Fiesta: Endless Seasoning Possibilities
Once your chickpeas are perfectly crispy, the fun truly begins: seasoning! While a simple sprinkle of sea salt is always delicious, the versatility of roasted chickpeas means you can explore an endless array of flavor profiles to suit any craving.
Savory Staples
These classic seasonings are fantastic for an everyday snack or as a versatile topping:
- Garlic Parmesan: Combine garlic powder, onion powder, and a sprinkle of grated Parmesan cheese (add Parmesan after roasting to prevent burning).
- Smoky Chipotle: Smoked paprika, chili powder, and a touch of cayenne for a subtle kick.
- "Cheesy" Nutritional Yeast: For a dairy-free cheesy flavor, toss hot roasted chickpeas with nutritional yeast, a pinch of garlic powder, and salt.
- Popcorn Seasonings: These finely powdered seasonings are designed to stick well and offer a huge variety, from white cheddar to ranch.
Mediterranean Medley
Embrace the vibrant flavors of the Mediterranean for a healthy, aromatic snack:
- Zesty Za'atar: A blend of thyme, sumac, and sesame seeds, perfect for a tangy, herbaceous note.
- Spicy Harissa: Mix harissa powder (or a tiny bit of harissa paste thinned with oil, added post-roasting) with cumin and a squeeze of lemon for a fiery kick.
- Classic Herb Blend: Dried oregano, thyme, rosemary, and a pinch of marjoram for an aromatic and comforting snack.
Sweet & Spicy Surprises
Don't be afraid to venture beyond savory. Roasted chickpeas can also be a delightful sweet treat!
- Cinnamon Sugar: A classic combination that turns chickpeas into a healthy dessert or sweet topping.
- Maple Chili: A drizzle of maple syrup (add after roasting, then re-crisp briefly) combined with a pinch of chili powder and sea salt creates an addictive sweet and spicy balance.
Pro Tip: For most spices, it's best to season the chickpeas immediately after they come out of the oven, while they're still hot and slightly oily. This allows the seasonings to adhere beautifully. Delicate herbs or cheeses are best added at this stage to prevent burning in the oven.
Troubleshooting & Storage: Keeping the Crunch Alive
Even with the best intentions, things can sometimes go awry. Here’s how to troubleshoot common issues and ensure your crispy roasted chickpeas stay that way.
Common Pitfalls and How to Fix Them
- Soggy Chickpeas: If your chickpeas emerge soft, it's almost always due to insufficient drying before roasting. While you can try to re-crisp them in a hot oven (see below), prevention is key. Next time, double down on the drying step!
- Burnt Chickpeas: This usually happens if your oven is too hot, you forgot to shake the pan, or you left them in for too long. An oven thermometer can help verify your oven's temperature. Remember the 10-15 minute shaking rule, and keep an eye on them towards the end of the cooking time – they can go from golden to burnt quickly.
- Not Crunchy Enough: Beyond drying, this often means they simply haven't roasted long enough. Don't be afraid to let them go a little longer. They should be firm and brittle, not just slightly firm.
Storage Secrets
While roasted chickpeas are best enjoyed fresh, you can store them to savor later.
- Cool Completely: This is vital! Before storing, allow your roasted chickpeas to cool completely on the baking sheet. If you store them while warm, trapped steam will create moisture, turning them soggy.
- Airtight Container: Transfer cooled chickpeas to an airtight container.
- Room Temperature: Store at room temperature for up to three days. While they might lose a *little* of their initial crunch, they will still be delicious.
- Re-Crisping: If they've lost their crispness, spread them in a single layer on a baking sheet and re-roast them in a 400°F (200°C) oven for 5-10 minutes. Keep a close eye on them to prevent burning.
Beyond the Snack Bowl: Culinary Applications
Roasted chickpeas aren't just for snacking! Their satisfying crunch and robust flavor make them an incredibly versatile ingredient:
- Salad Topping: Add a sprinkle of seasoned roasted chickpeas to your favorite green salads for extra texture and protein, making them a fantastic alternative to croutons.
- Soup Garnish: A handful of crispy chickpeas can elevate a creamy soup with a delightful textural contrast.
- Hummus Topping: Sprinkle them over a bowl of hummus for an added layer of flavor and crunch.
- Grain Bowls & Wraps: Incorporate them into grain bowls or wraps for a satisfying, plant-based protein boost.
Say goodbye to soggy snacks and hello to your new favorite crunch! With these expert tips and a little practice, you'll be mastering perfectly crispy roasted chickpeas in no time. They’re not just a healthy chip alternative; they're a versatile, flavorful staple that will satisfy your cravings and nourish your body. Enjoy the journey to ultimate crispness!
